A User’s Guide to First Aid

Not all heroes wear capes. Some carry first aid kits! This guide can help you save the day.

Imagine you’re biking with friends when suddenly, thud! Your friend is on the ground—and she looks hurt. Would you know what to do? 

If your first reaction is to call 911, that’s a great impulse. But some injuries don’t require a trip to the ER. That’s when knowing basic first aid skills can help. 

“In the case of an emergency, having first aid knowledge may give you the confidence to step up and help out,” says Dr. Jeffrey Upperman. He’s a pediatric surgeon.

That’s why it’s smart to learn about the items in your first aid kit before you need them. Don’t have a first aid kit? We’ve got you! This guide will teach you about basic first aid tools and techniques—and how to use them.

1. Bandages

Pack your kit with plenty of adhesive bandages in several sizes. Bandages help protect cuts and scrapes from infection. Also include gauze pads, medical tape, and antibiotic cream or wipes.

WHAT TO DO:

1. Using a clean, soft cloth or gauze pad, apply pressure to the injured area to stop the bleeding. You often need to apply pressure to the wound for longer than you’d expect, says Dr. Upperman.

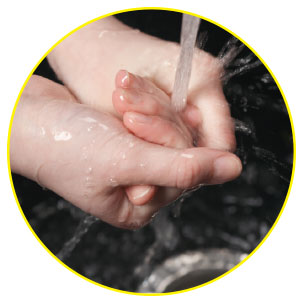
2. Clean the injured area with water. If you have soap, you can wash around the cut, but try not to get soap inside the cut itself.

3. Apply a thin layer of an antibiotic cream or gel like Neosporin directly to the wound, or gently wipe it with an antiseptic wipe. This can help prevent infection and allows the wound to heal faster.

4. Cover the wound with a bandage. If the cut is too big for a bandage, use another gauze pad, securing it with medical tape.

WHEN TO GET HELP:

If applying pressure doesn’t stop the bleeding after about 15 minutes, or if the cut is very deep or dirty, you should call a doctor.

2. Tweezers

Do you have a splinter or tiny glass shard stuck in your skin? Or did you notice a tick on your leg? Tweezers are your go-to tool because they help you grab and remove small objects.

WHAT TO DO:

1. If you’re removing a splinter or other small object from your skin, carefully pull the object out in the same direction it entered to avoid leaving pieces behind. 

2. If you’re removing a tick, grasp the tick as close to your skin’s surface as possible. Pull upward using steady, even pressure—don’t twist or yank the tick. That can leave parts of its body in your skin.

3. Thoroughly wash the area where the object was with water and soap—you’re all set!

WHEN TO GET HELP:

Let an adult know if you find a tick on your body, and have them check the spot of the bite daily for the next few weeks. If you develop a fever or rash, it could be a sign of Lyme disease, a type of infection caused by tick bites. Call a doctor if you develop any symptoms.

3. CPR

CPR stands for cardiopulmonary resuscitation. It helps keep oxygen moving through the lungs if a person has stopped breathing. In-person CPR training is best (find a class at redcross.org). Even if you haven’t taken a class, you can still perform CPR. Tip: You can practice on a firm pillow or cushion.

WHAT TO DO:

Girl Scout Ivy Ngyuen used her CPR training when friend Brandon Vu became unconscious in a pool. She administered CPR until paramedics arrived, saving his life.

1. If you’re with someone who collapses, call 911.

2. If the person doesn’t respond to you and has stopped breathing, perform CPR. Position the person on their back on a hard, flat surface. Put one hand on top of the other and place your hands in the middle of the person’s chest. 

3. With your shoulders directly over your hands and your elbows locked, push down quickly and firmly on the person’s chest. 

4. Continue giving quick, firm compressions to the beat of “Baby Shark” or Beyoncé’s “Crazy in Love” (about 100-120 compressions per minute). Continue until help arrives.

WHEN TO GET HELP:

If someone is unresponsive, always call 911. The dispatcher can walk you through the CPR steps. 

4. Heimlich Maneuver

If a friend is choking on a piece of food, knowing how to perform this procedure could save their life.

WHAT TO DO:

1. Ask the person if they’re choking. If they can speak or cough, don’t perform the Heimlich maneuver.

2. If they can’t speak or cough, follow these steps:

  • Stand behind the person and place your arms around their belly.
  • Make a fist with one hand, and cover it tightly with the other hand. Place your fist just below the person’s rib cage (about 2 inches above the belly button).
  • Quickly and powerfully, thrust your fist inward and upward five times in a row. Repeat this until the food comes out. But if the person becomes unconscious, stop and perform CPR instead.

WHEN TO GET HELP:

If another person is with you, have them call 911 while you perform the Heimlich maneuver.

5. Cold Pack

Be sure your kit has an instant cold pack. It helps ease the pain of a pulled or sprained muscle while also reducing swelling.

WHAT TO DO:

1. Activate your cold pack by squeezing or shaking it. If you don’t have a cold pack in your kit, a bag of frozen fruit or veggies works. Or make a cold pack by putting several ice cubes in a zip-top sandwich bag. Add some water, then seal the bag, squeezing some of the air out.

2. To protect the skin, wrap the cold pack in a cloth or a small hand towel. Then place it on the injured muscle for 10 to 15 minutes. Repeat with a fresh or refrozen cold pack every hour.

WHEN TO GET HELP:

If you can’t move part of your body or if the swelling gets worse, it’s time to get medical attention.

6. Autoinjector

If someone with a severe allergy to a food like nuts or shellfish comes in contact with the allergen, they could experience a life-threatening condition called anaphylaxis. An autoinjector of the medication epinephrine (often sold under the brand name EpiPen) can instantly treat the anaphylaxis.

WHAT TO DO:

1. Act fast. If you’re unsure whether someone is having an allergic reaction, don’t wait. It’s best to give them the shot, even if it turns out they didn’t actually need it. 

2. All autoinjectors will have instructions on them. If the autoinjector is an EpiPen, it will have a blue end and an orange end. Hold the EpiPen with the blue end facing up. Pull the blue safety release up and off. Place the orange end near the outer mid thigh.

3. Swing your hand back, then jab the orange end of the EpiPen into the person’s thigh at a 90-degree angle. You should hear it click. Hold it in place in for three seconds.

WHEN TO GET HELP:

Always get medical attention for someone who’s had an allergic reaction. Even if they seem OK after using the autoinjector, it’s important to make sure they’ve recovered completely.  

unconscious

<p><i>adjective</i></p>

<p><b>unable to respond to people and unaware of what is happening&nbsp;&nbsp;</b></p> <p>&nbsp;</p> <p>After a baseball hit his head, he fell down and became&nbsp;<b>unconscious</b>.</p>

allergen

<p><i>noun</i></p>

<p><b>a substance that can cause an allergic reaction</b></p> <p>&nbsp;</p> <p>You may experience severe reactions to an&nbsp;<b>allergen</b>&nbsp;like peanuts or pollen.&nbsp;</p>

compressions

<p><i>noun</i></p>

<p><b>hard, fast, pushes&nbsp;</b></p> <p>&nbsp;</p> <p>If you sense that someone has stopped breathing, make sure to give them chest&nbsp;<b>compressions</b>.&nbsp;</p>

Get the digital lesson plan for this article

You Might Also Like:

Skills Sheets (2)
Skills Sheets (2)
Lesson Plan (1)
Text-to-Speech